Want to know how to build a dance studio floor in your own home? With the rise of home gyms and personal training spaces, dance enthusiasts are transforming bedrooms, basements, and garages into professional-grade studios. Whether you’re into ballet, hip-hop, or freestyle, having the right dance floor is essential for safety, performance, and style.
The rise of home gyms has redefined how we prioritize fitness, but there’s a new trend taking center stage: dedicated home dance spaces. Much like yoga studios and weight rooms, home dance floors are becoming a must-have for enthusiasts craving a professional, inspiring environment to practice ballet, hip-hop, salsa, or even just freestyle. With more people investing in versatile home setups, the demand for specialized dance floor solutions, like durable, shock-absorbent studio flooring, has surged. In this guide, we’ll break down how to design a functional, stylish dance area that rivals a professional dance studio, even in compact spaces.
How to Build a Dance Studio Floor Step-by-Step
If you’re wondering how to build a dance studio floor, start by choosing the right space and flooring materials. From shock-absorbent surfaces to soundproofing, here’s how to create a setup that suits your dance style and space.
Why Home Dance Spaces Are the Next Big Thing
Dance isn’t just exercise—it’s a form of self-expression, stress relief, and creativity. A dedicated dance space at home offers:
- Convenience: No commute to dance classes or studios.
- Privacy: Perfect for beginners or those self-conscious about practicing in public.
- Customization: Tailor the space to your style, whether it’s ballet barres, disco lights, or a mirrored wall.
- Health Benefits: Improves flexibility, coordination, and cardiovascular health while reducing stress.
With remote dance classes and online tutorials booming, creating a home dance zone ensures you can groove anytime, rain or shine.
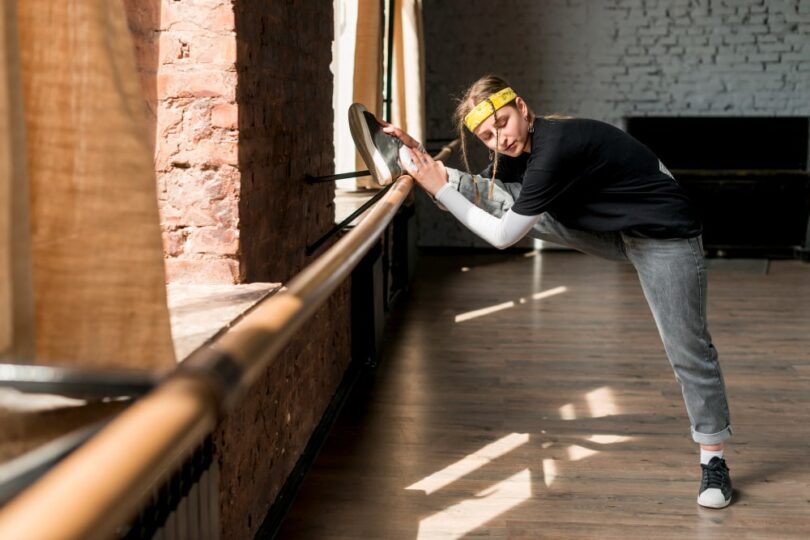
Step 1: Choose the Right Location
The first step is selecting a space that balances practicality and inspiration. Consider:
- Room Size: Even a corner of a living room or spare bedroom can work. Aim for a minimum of 3m x 3m for freestyle movement.
- Flooring Surface: Hardwood, concrete, or uneven carpets can lead to injuries. Opt for professional dance studio flooring (like this customizable option) designed to cushion joints and support pivots.
- Noise Control: If you’re upstairs or in a flat, soundproofing mats or thick flooring layers reduce impact noise.
Step 2: Invest in Professional-Grade Flooring
Your dance floor is the foundation of every move—literally. Skimping here risks injuries and limits your ability to perform turns, jumps, or slides safely.
Key Features of Dance-Specific Flooring
- Shock Absorption: Reduces strain on knees and ankles during high-impact routines.
- Slip Resistance: Provides grip for quick direction changes without restricting fluid movement.
- Durability: Withstands daily wear from shoes, spins, and equipment.
- Aesthetic Appeal: Sleek finishes mimic professional studios.
For example, interlocking dance floor tiles offer easy installation and portability, making them ideal for multi-use spaces.
Step 3: Add Mirrors for Form and Space
Mirrors aren’t just for checking your reflection—they’re critical for refining technique and creating the illusion of a larger area.
- Placement: Cover one wall floor-to-ceiling, or use smaller panels strategically.
- Safety: Choose shatterproof acrylic mirrors if kids or pets are around.
- Lighting: Pair with adjustable LED lights to eliminate shadows and highlight movements.
Step 4: Optimize Lighting for Ambiance
Lighting sets the mood. Harsh overhead bulbs kill vibes; instead, layer your lighting:
- Task Lighting: Bright, focused lights for technical practice.
- Ambient Lighting: String lights, dimmable LEDs, or smart bulbs for freestyle sessions.
- Colorful Accents: RGB strip lights add a party-ready flair for Zumba or jazz routines.
Step 5: Personalize Your Dance Sanctuary
Make the space uniquely yours with thoughtful touches:
- Storage: Wall-mounted racks for shoes, resistance bands, or costumes keep clutter at bay.
- Decor: Inspire creativity with motivational quotes, posters of dance icons, or a small speaker system.
- Versatility: Use foldable barres or portable poles that tuck away when not in use.
Step 6: Maintain Your Dance Floor
Protect your investment with simple upkeep:
- Daily: Sweep or vacuum to remove dust.
- Weekly: Wipe with a damp mop and pH-neutral cleaner.
- Monthly: Check for loose tiles or wear and tear.
Real-Life Inspiration: Small Spaces, Big Impact
- Apartment-Friendly: Sarah, a London-based salsa dancer, transformed her 2m x 2m balcony into a dance nook using roll-out flooring and foldable mirrors.
- Multi-Use Rooms: The Johnson family uses their garage for both workouts and dance by switching between gym mats and interlocking dance tiles.
Final Tips for Your Home Dance Studio
- Start small—even a corner with proper flooring and a mirror can work.
- Prioritize safety: Never dance on uneven or slippery surfaces.
- Have fun! Your space should energize, not intimidate.
Ready to Dance?
Creating a home dance floor isn’t just about square footage—it’s about crafting a space that fuels your passion. With the right flooring, lighting, and layout, you’ll never miss a beat. For professional-grade options, explore our top-rated dance floor solutions designed to elevate your home studio.
Whether you’re pirouetting, popping, or practicing pliés, your dream dance space is just a few steps away. Turn up the music, and let the rhythm take over!